

How To Pack A Charcoal Drawing For Shipment
- Abode
- Drawing Supplies
- How to Shop Charcoal Drawings
How to Store Charcoal Drawings
You've merely finished your latest, sensational charcoal drawing. Now what?
Most likely, information technology will need to exist safely stored for some time.
Even if you frame it, sell it, and everything is beyond fabulous, yous will need a safe way to transport the cartoon from your dwelling to the frame shop! (Peculiarly if it's drawn in charcoal, which doesn't accept kindly to whatever accidental pokes or prods.)
How to Store Charcoal Drawings:
Commonly Recommended Methods
Commonly recommended methods include using a spray fixative, or layering a smooth, glossy newspaper such equally glassine between drawings.
I personally cull to utilise a third method. In my opinion, the only surefire way to preclude damage to the surface of a drawing is to make sure that aught touches or disturbs it.
While you tin get away with layering glassine on top of graphite drawings (though it'south not ideal), I wouldn't identify anything on top of a charcoal cartoon. It simply smudges likewise easily.
Should you utilise hairspray to secure your drawing?
No, I exercise not recommend spray-fixing your drawing with hairspray. It is not meant to be used on paper, and is not acid-free or archival, then it could eventually eat through or degrade your drawing.
Should you utilize a unlike spray fixative to secure your cartoon?
To use spray fixatives or non is a hotly debated topic. For me, it's not worth the r isk of the spray appearing blotchy or changing the values of my drawing.
It'due south entirely possible that other artists have institute products and developed techniques to avert these pitfalls, and if you lot feel called to research spray fixatives, I whole-heartedly encourage y'all to do then.
However if, like me, you would really rather be drawing, I offer you the following solution:
How to Store Charcoal Drawings?
Build a Carrying Example!
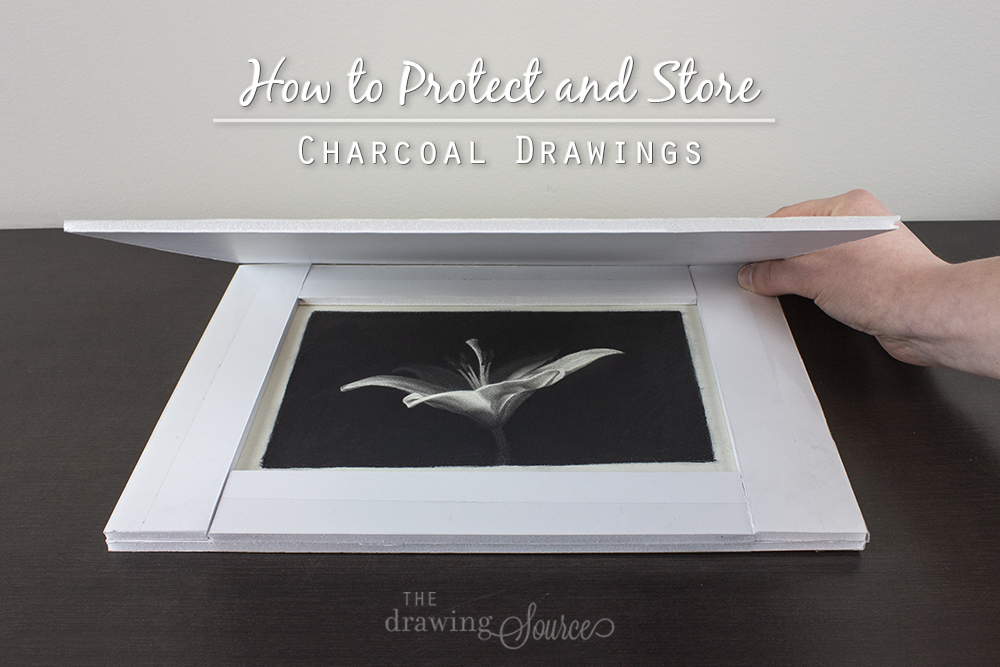
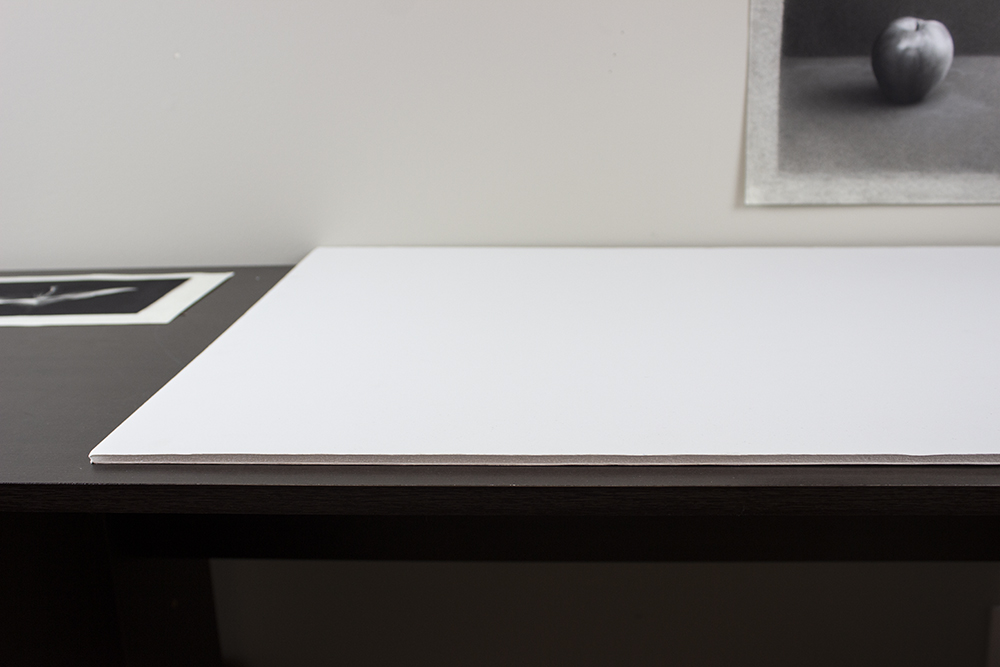
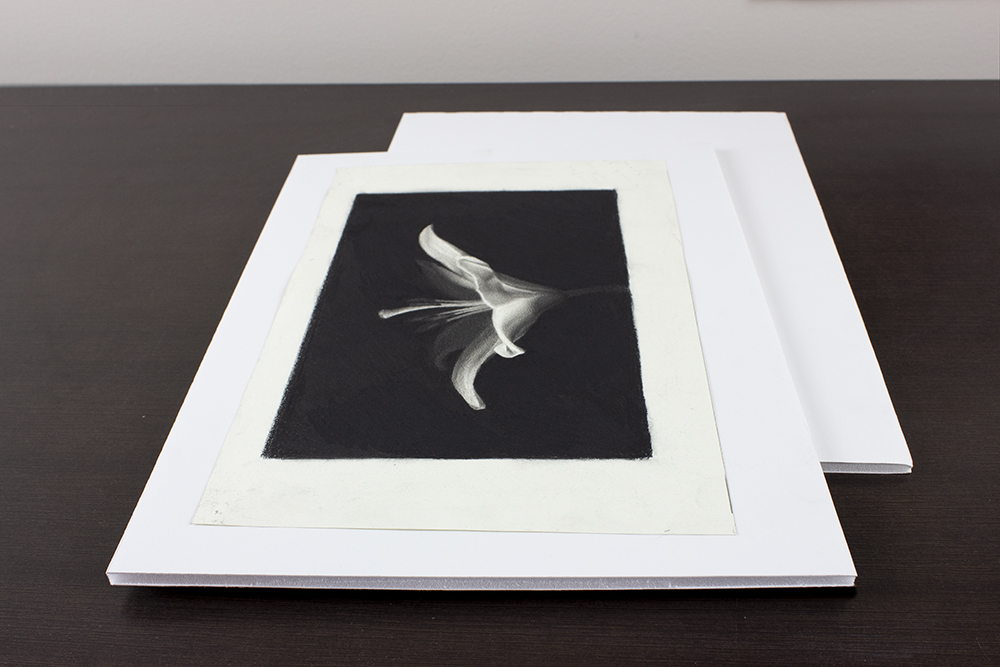
I prefer to store charcoal drawings in custom-sized carrying cases.
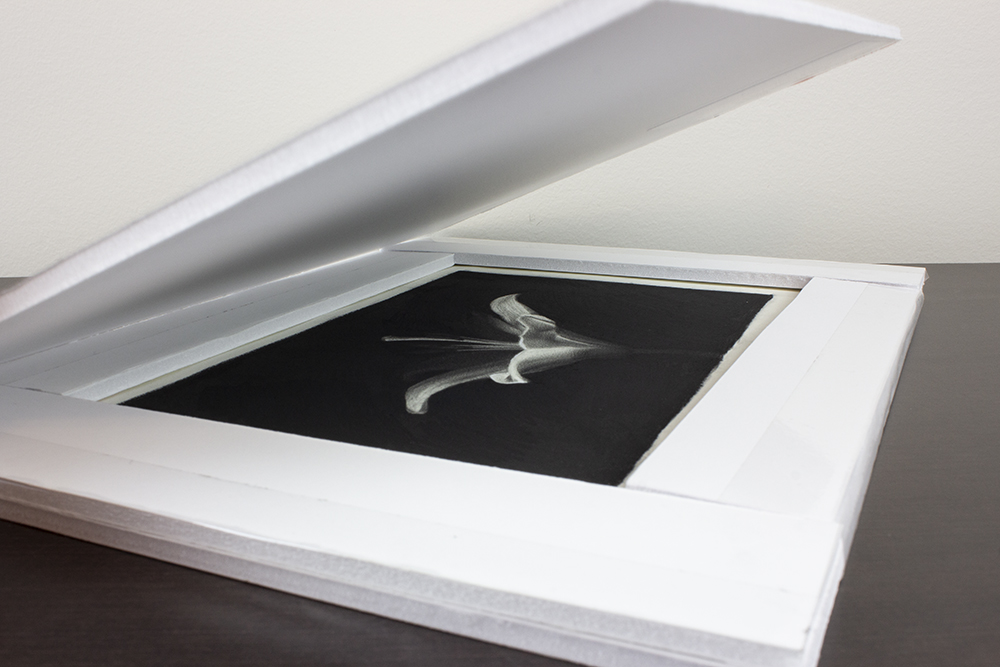
These are synthetic in a mode that leaves space above the drawing itself.
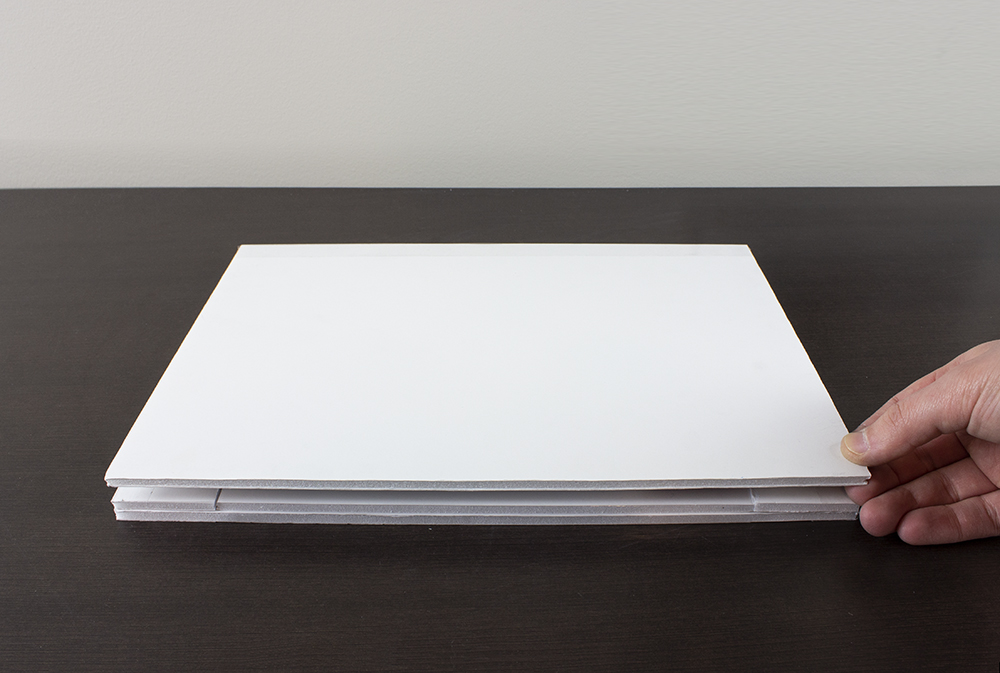
Fabricated out of cream core board, these are lightweight yet sturdy, and are convenient for both storage and transportation by car or aeroplane.
(If you do transport a drawing in a carrying example via plane, have it with yous as a carry-on particular, and stash information technology beneath the seat in front of yous rather than putting it in the overhead bin, where it'south likely to be squished.)
I construct these storage/carrying cases for drawings upward to approximately 18" 10 24", which also happens to be the standard size of foam core board. For larger drawings, or for aircraft, I build sturdier boxes or crates using paper-thin or forest, depending on the size of the drawing.
How to Store Charcoal Drawings
Materials Used to Build this Carrying Case:

- Foam Cadre Lath: 18" x 24" (standard size). You can purchase this at a dollar store, or at Michael'due south (I recommend Michael's - it is more than expensive but better quality).
- Pencil: for marking measurements and lines
- Ruler
- Framing Square (optional but recommended)
- X-Acto Pocketknife or Single-Edge Razor Blade
- Packing Tape
- Scissors
- Painter's Tape
- Cut Mat or Cardboard (to cut on top of)
How to Store Charcoal Drawings
How to Brand a Carrying Case for your Drawing
ane. Brainstorm with a clear working expanse, and your sheet of foam core.
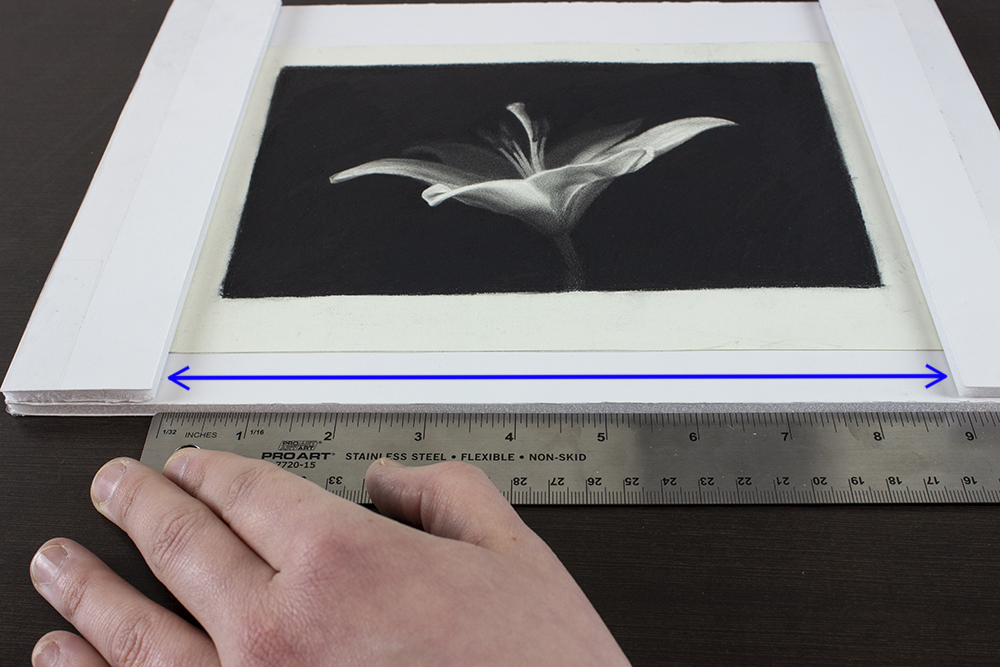
2. Place your drawing on the foam core. Determine and mark what size you will make the top and bottom planes of your conveying instance.
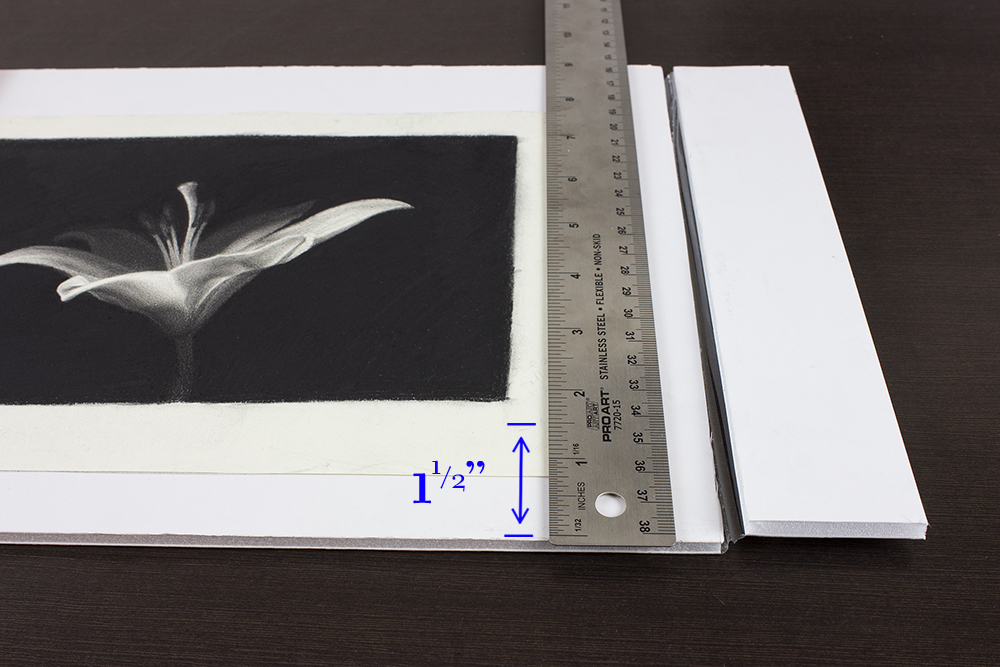
Leave plenty room for the side panels to be around 1.5" to 2" wide. If the side panels are too thin, there will be a greater take a chance that the cover of the case will bow in and touch the surface of your cartoon.


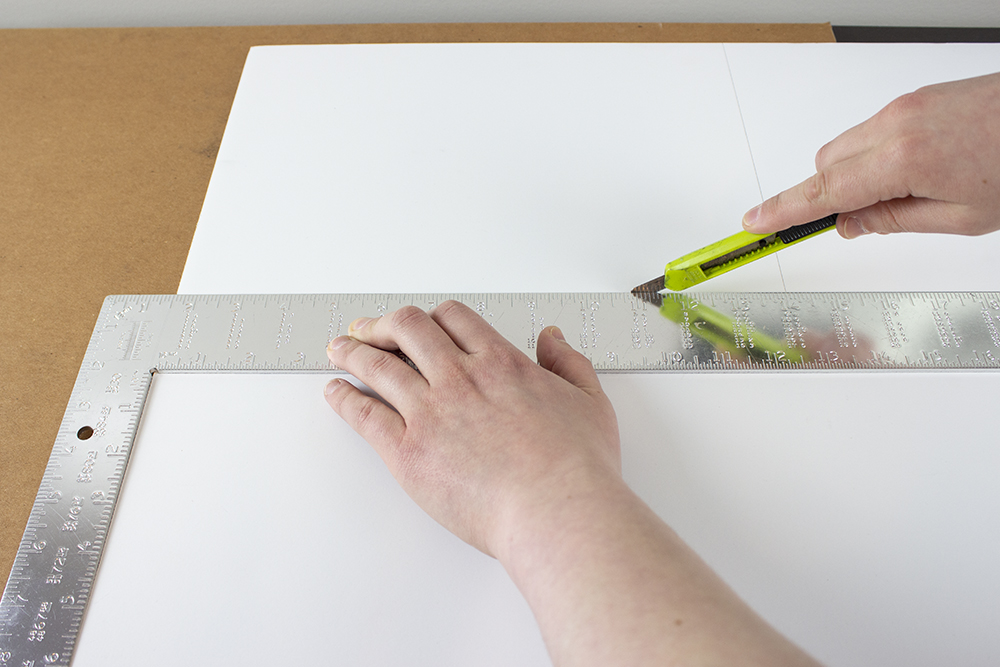
3. Remove your cartoon from the foam core, and cut out the bottom plane of your carrying case using an X-acto knife or single-edge razor blade. Utilise whichever you have or prefer, just brand certain that it is precipitous!
(I switch from this X-acto knife to a single-edge razor blade half-way through this tutorial considering the latter was much sharper and giving me much cleaner edges.)
Cut on elevation of a cutting mat or piece of cardboard to protect your work table.
Using a framing square is optional but useful for keeping the edges of the carrying case square.
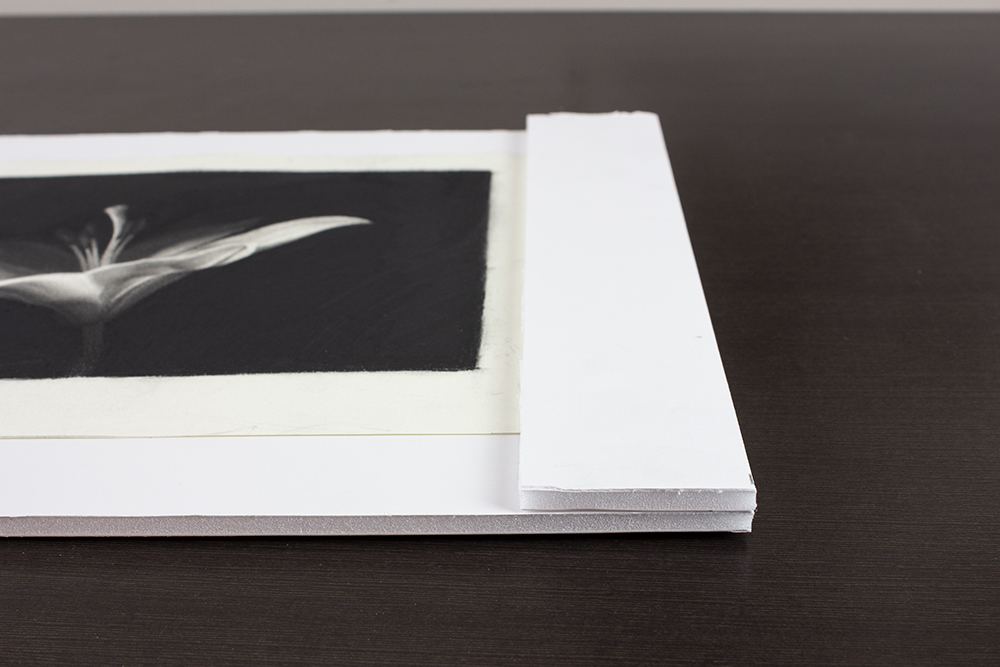
 The cutting out bottom plane of my carrying instance.
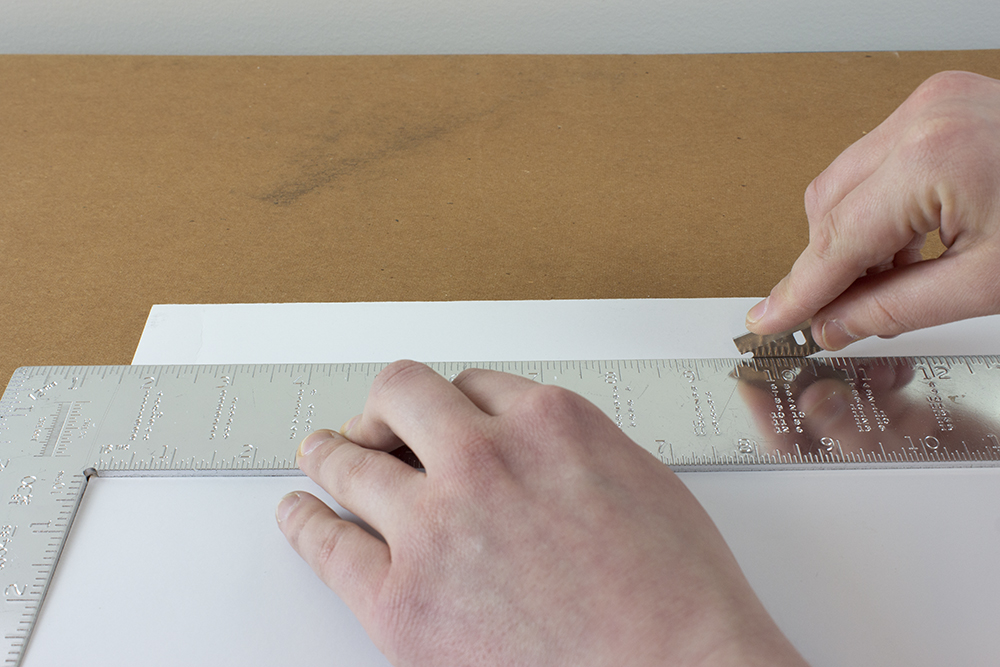
4. Using the lesser plane as a template, mark and cut out an equal-sized meridian aeroplane, or cover, for your carrying example.
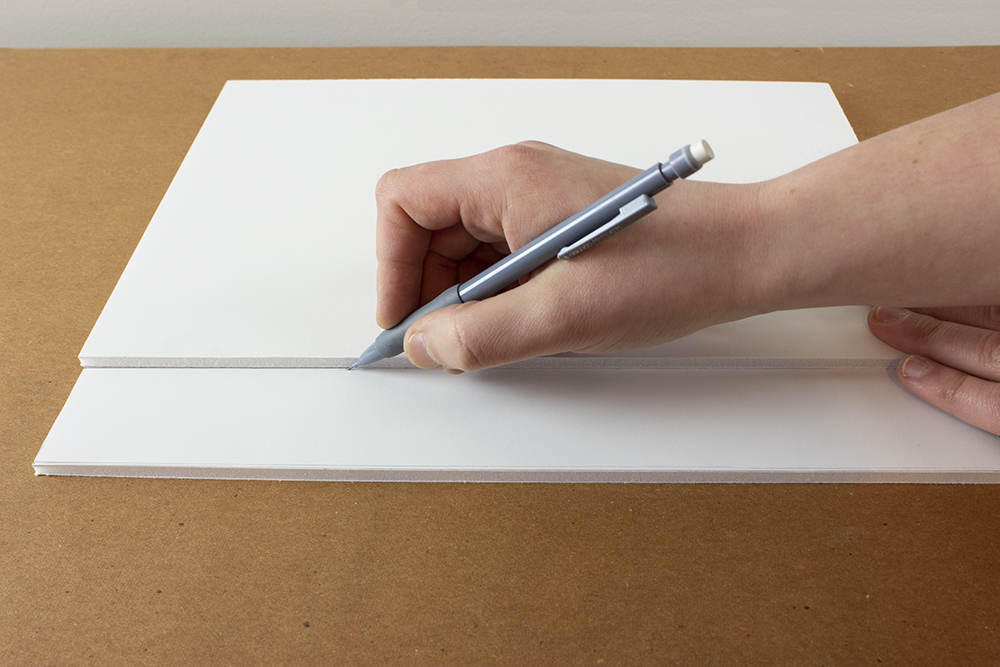
 You should now take ii equal-sized top and bottom planes of the carrying case.
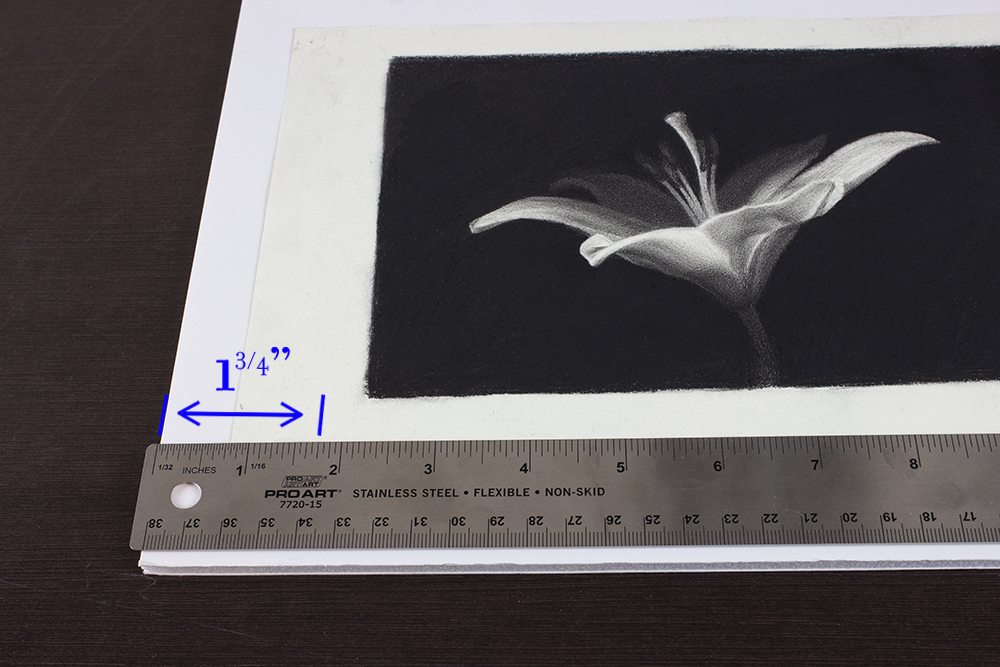
5. Next, let'south figure out the dimensions of the left and correct side panels.
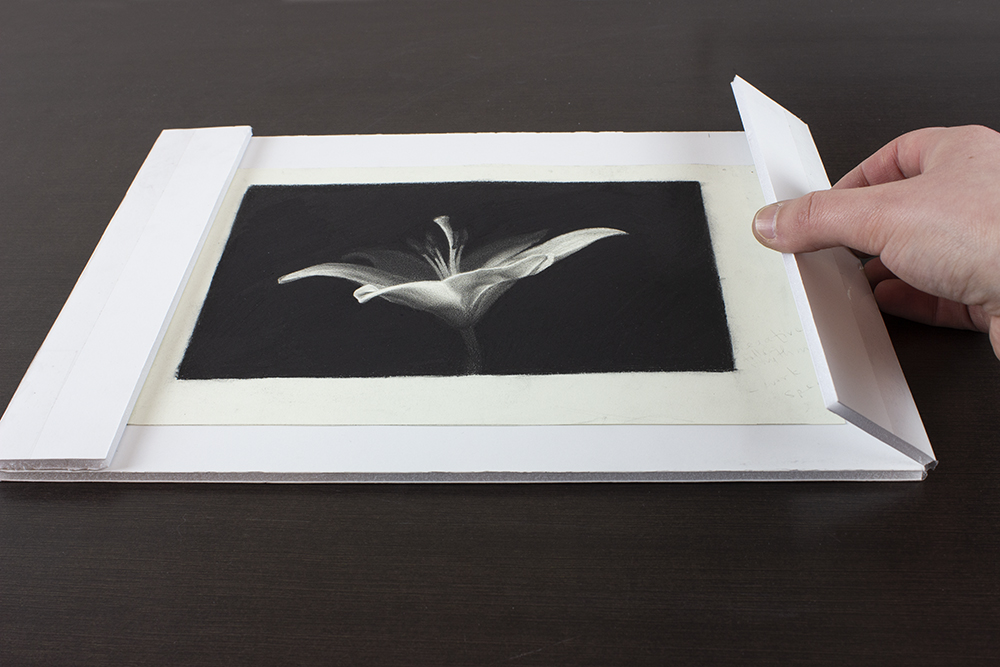
The side console is going to cover role of the border of my drawing, but non attain the drawing itself (having information technology rub against the drawing would defeat the purpose of what we're doing hither). I'm going to make my get-go side panel about ane and three/iv inches wide.
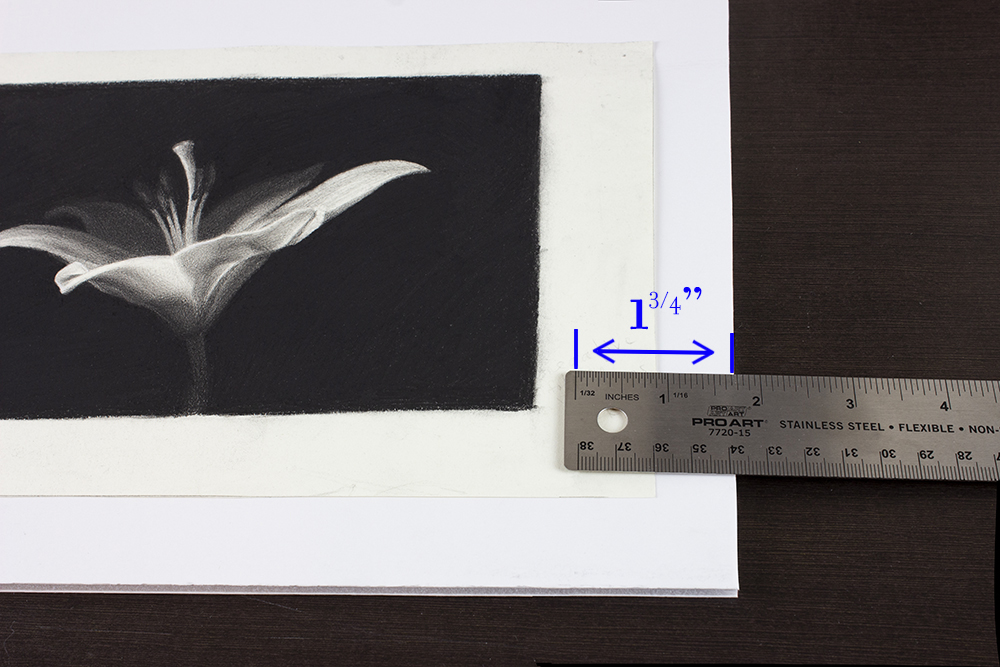
The same width volition work for the left side panel as well (ane and 3/4"):
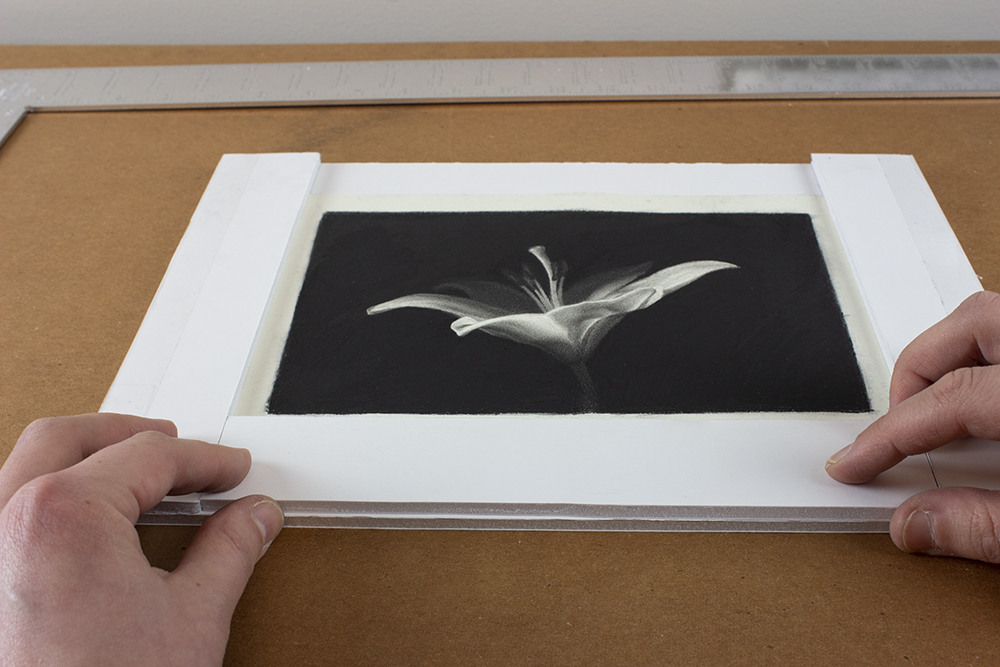
6. Cut out the two side panels, and identify them on the lesser plane of your carrying example.
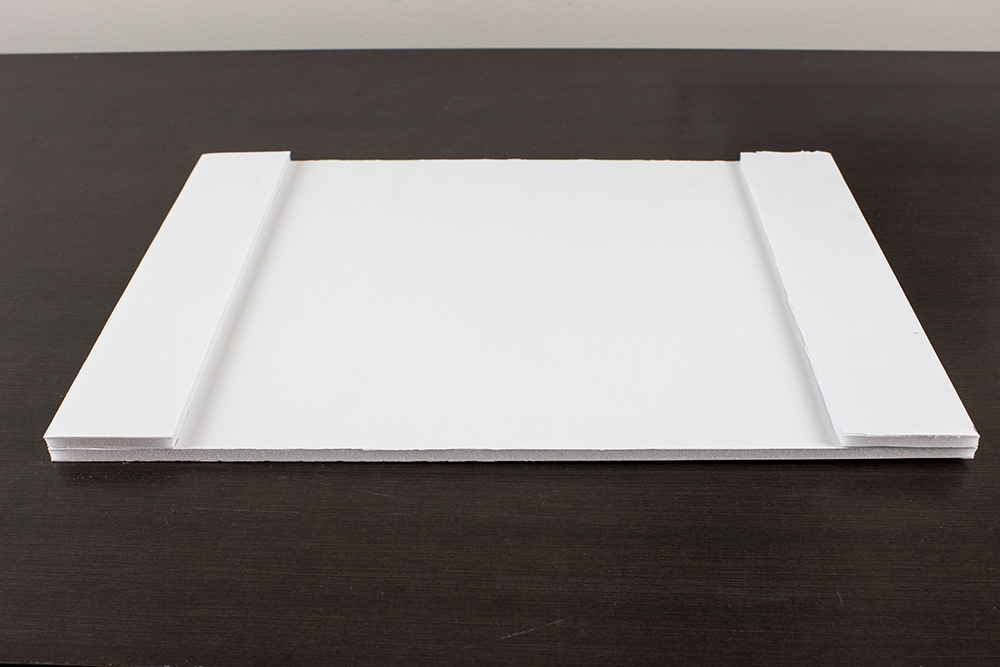
Now when I place my drawing in the center of my carrying case, the side panels partially cover the borders of the drawing, without reaching the drawing itself. Perfect!
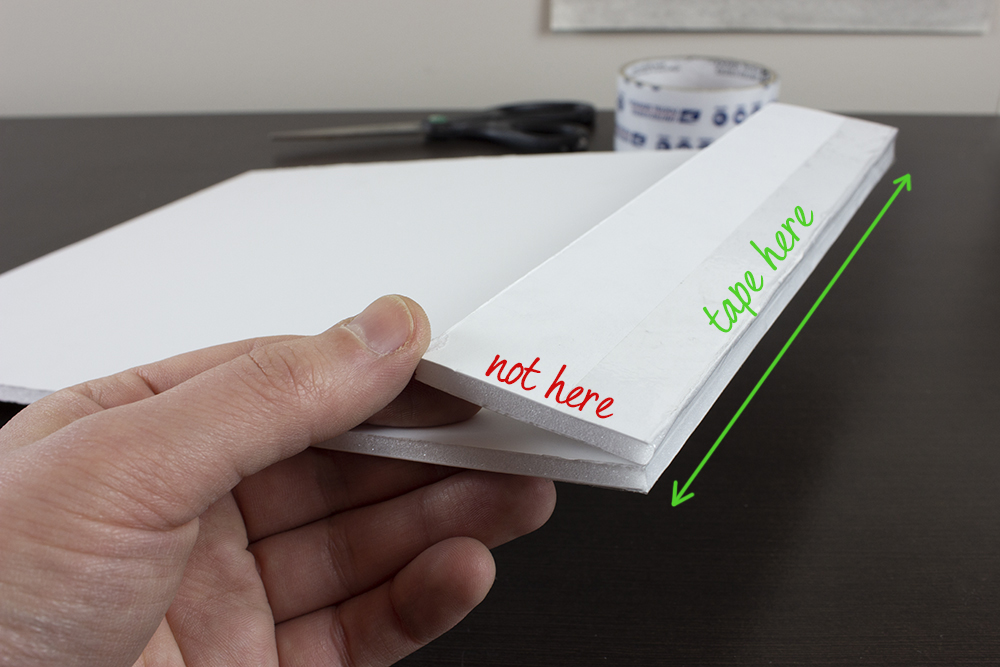
seven. Tape the side panels to the lesser plane, only along the long edge then that you lot tin open up and close the flaps of the case. I am using clear packing tape.
eight. Decide the dimensions of the two remaining side panels. These elevation and lesser panels will demand to fit in between the ones that you just taped on.
9. Cutting out the remaining panels ...
x. And adapt them on your conveying instance:
eleven. Tape the long edges of the remaining side panels, so that all four tin be opened separately.

 All four side panels can be opened separately.
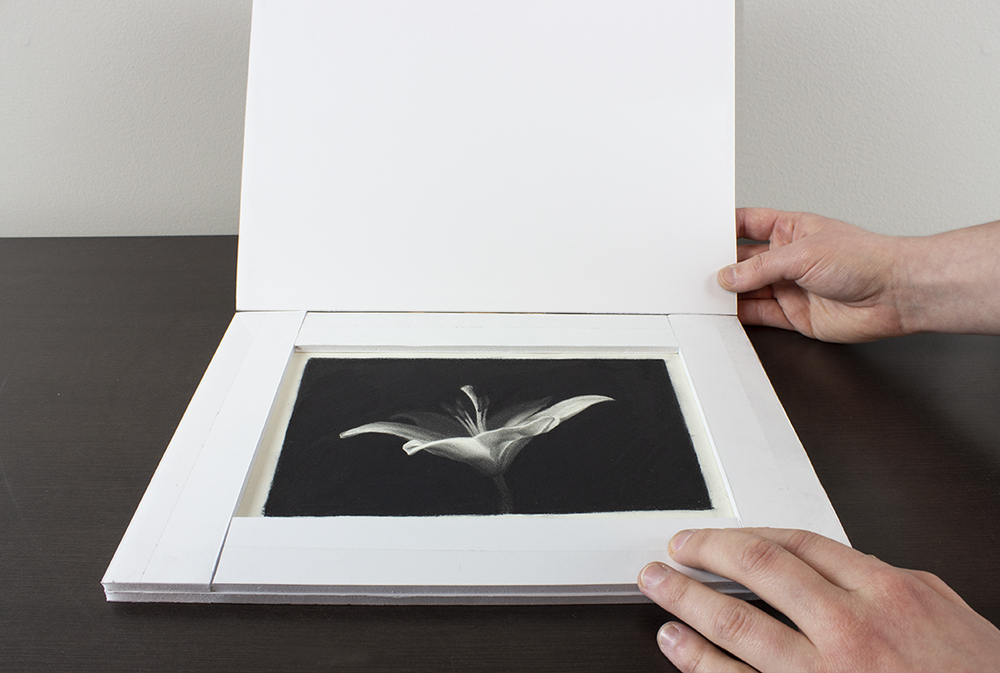
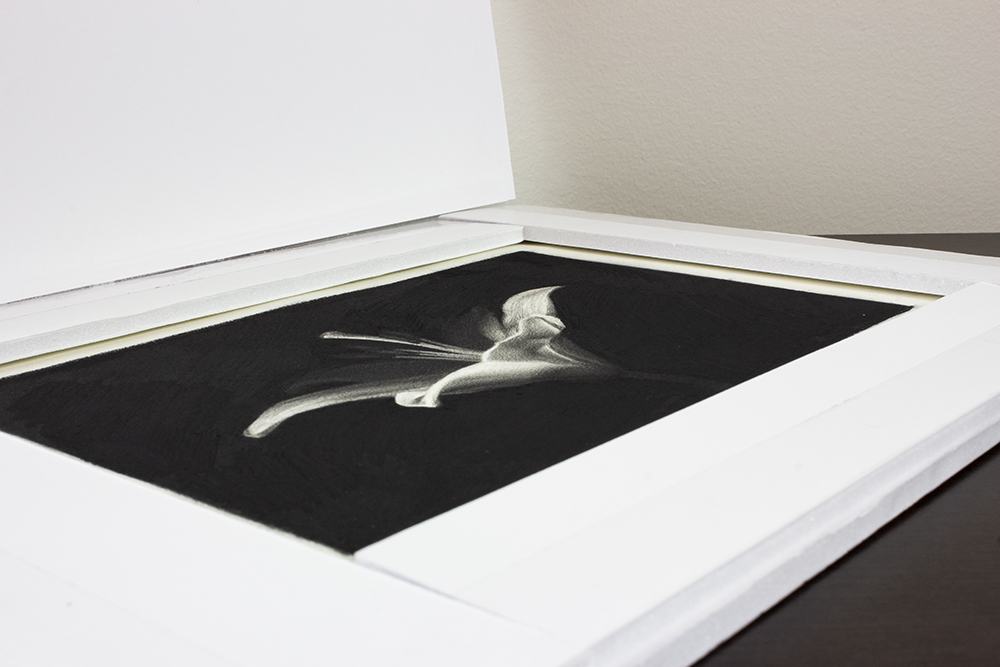
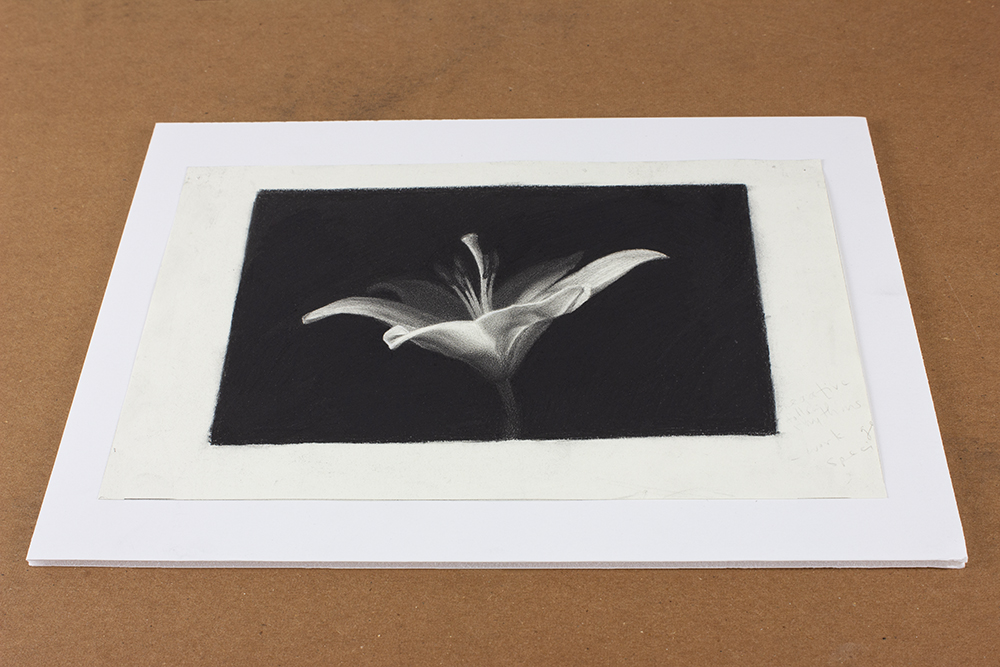
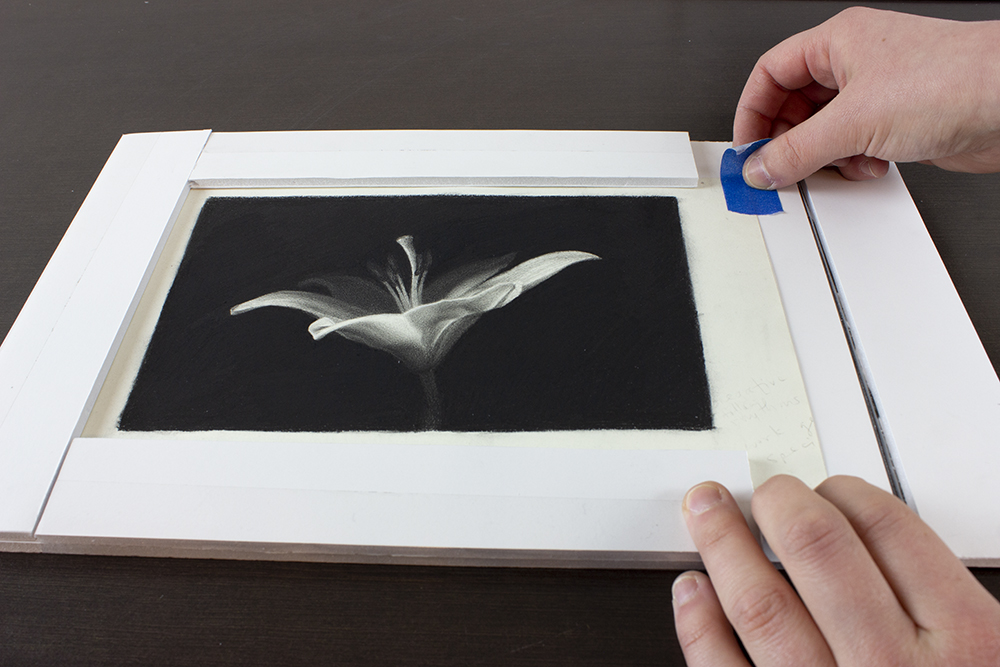
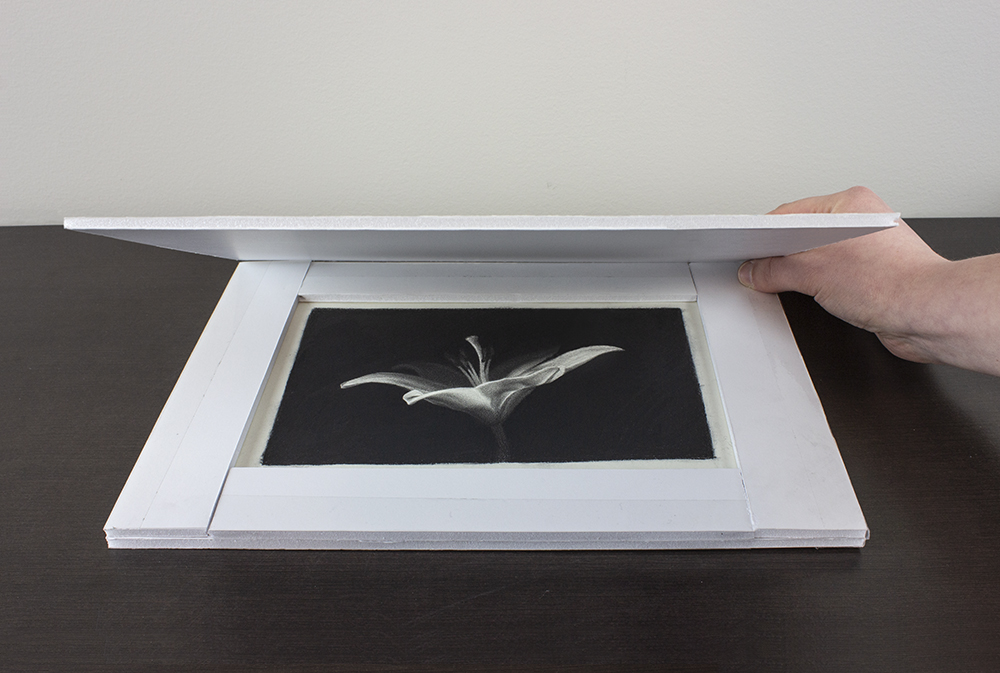
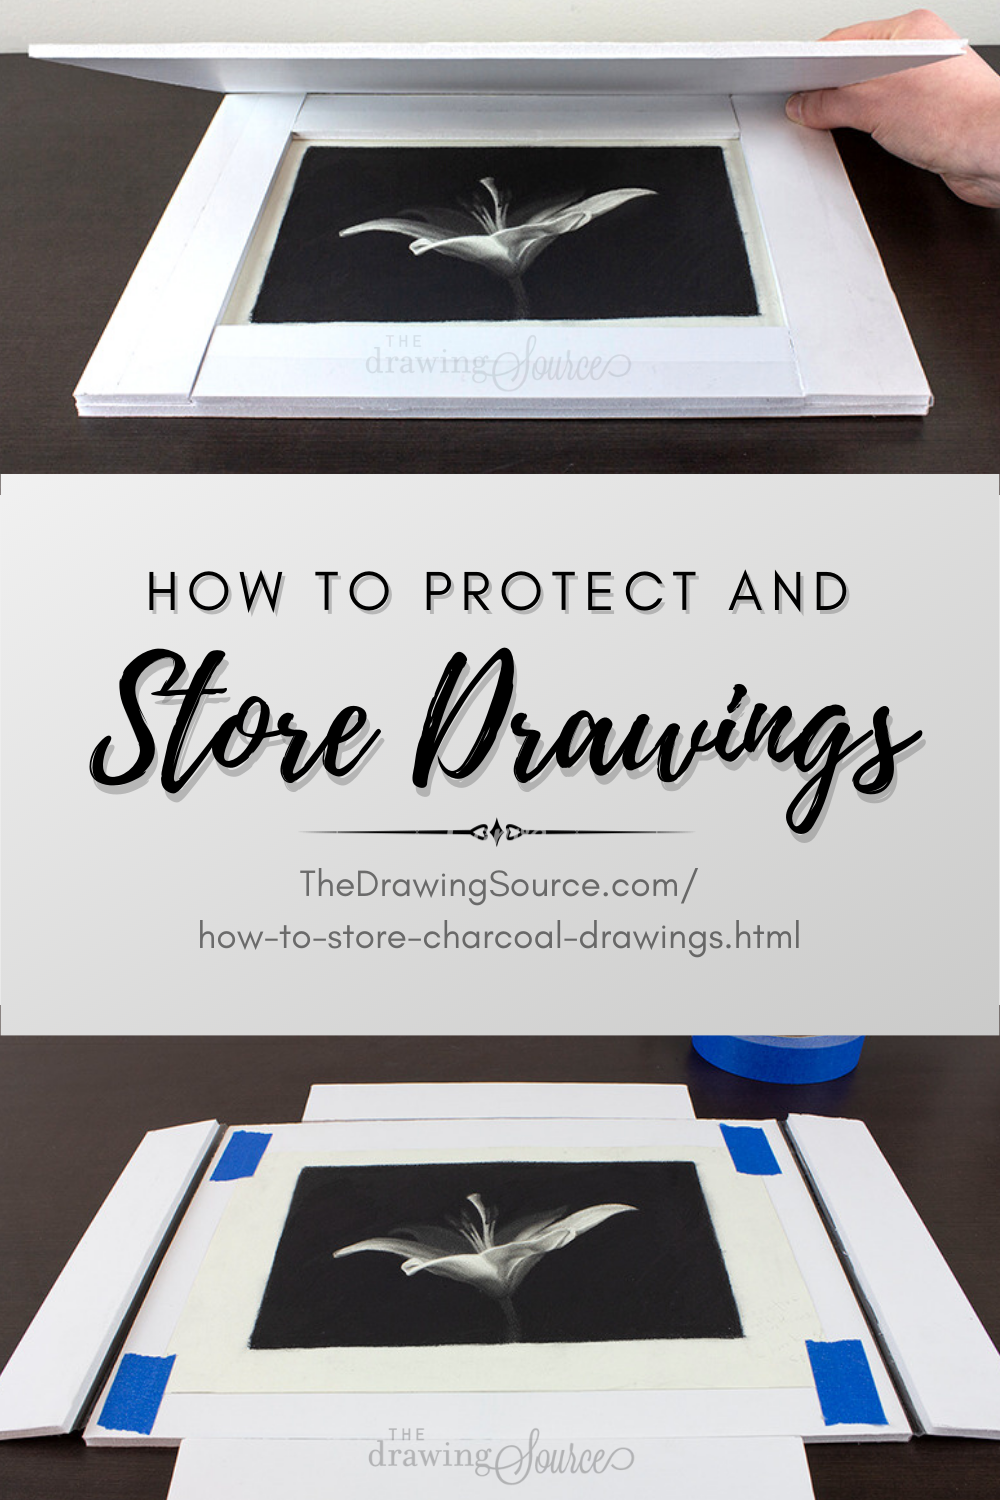
12. Center your drawing in the carrying case, and secure it using painter's tape.
As a precaution, I like to stick each piece of painter's tape to my article of clothing earlier adhering it to my drawing. This slightly lessens its stickiness and should forbid information technology from ripping my drawing.
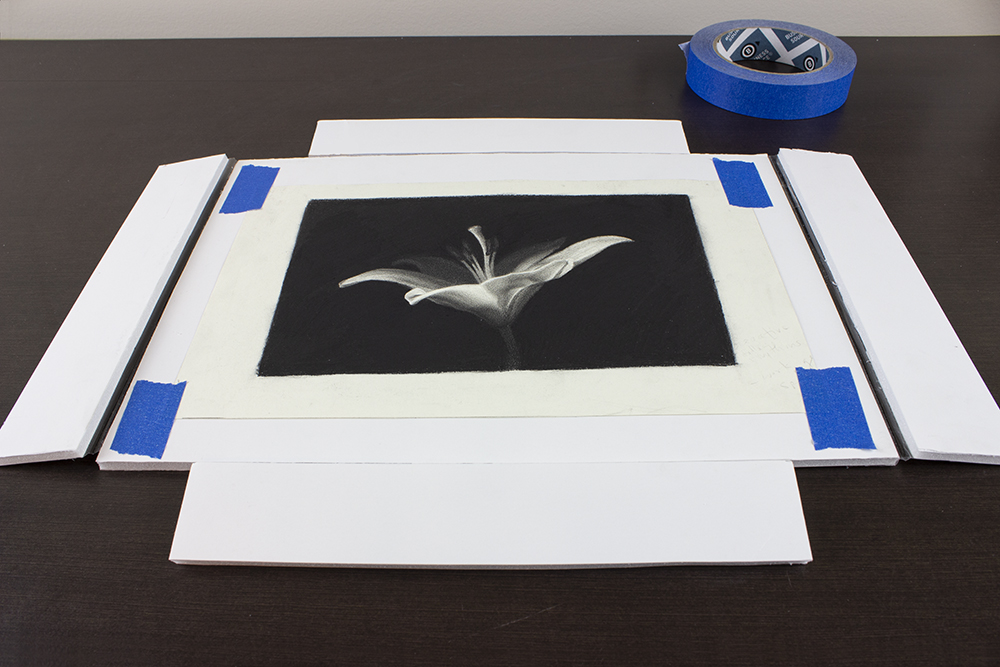 My cartoon secured in its conveying example with painter'due south tape.
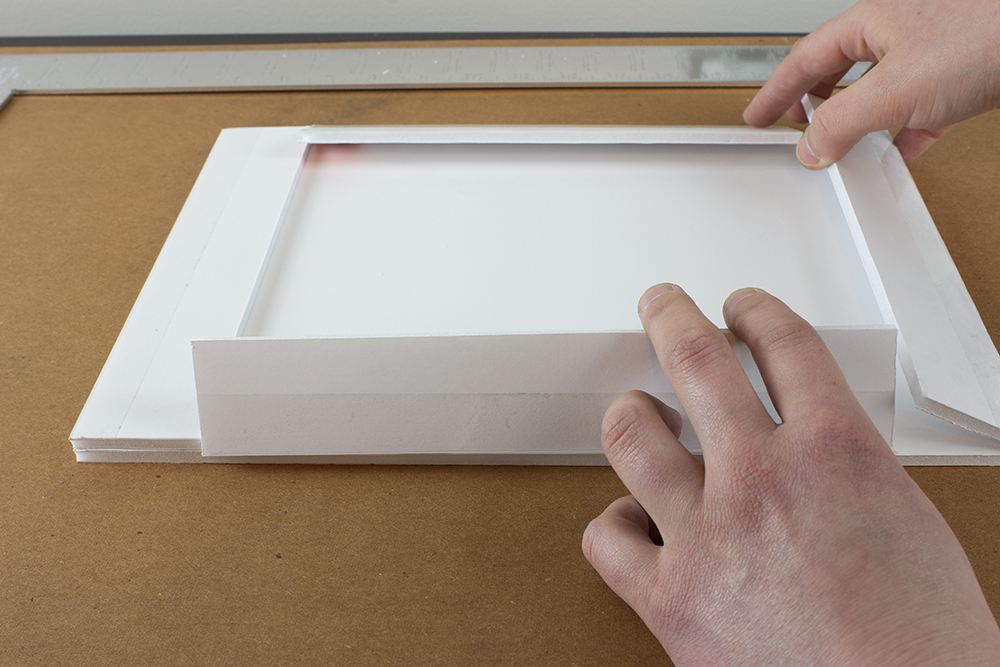
13. Add the embrace to your carrying case.
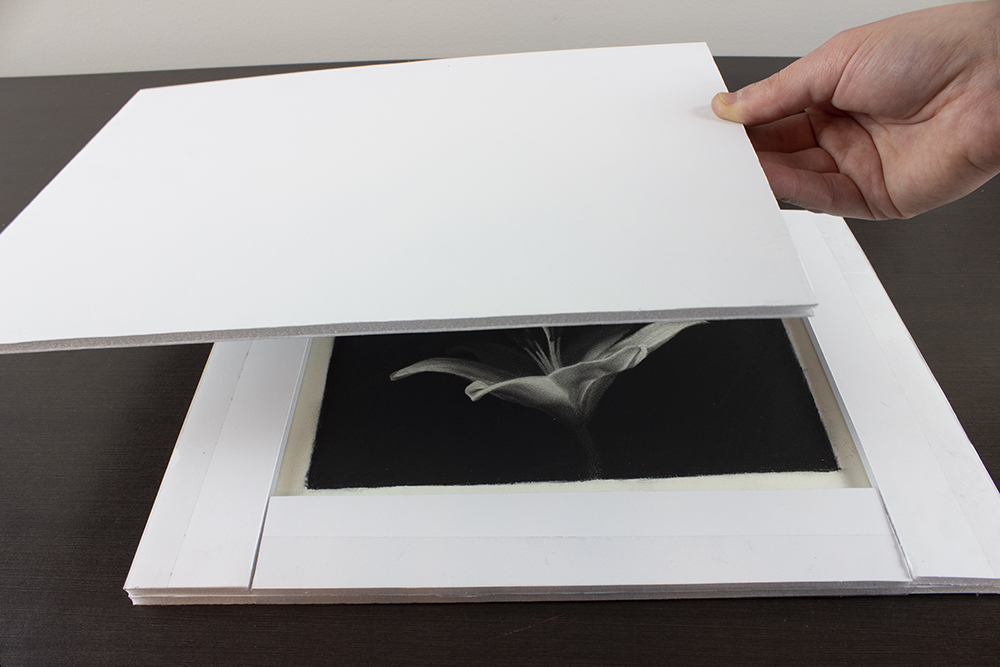
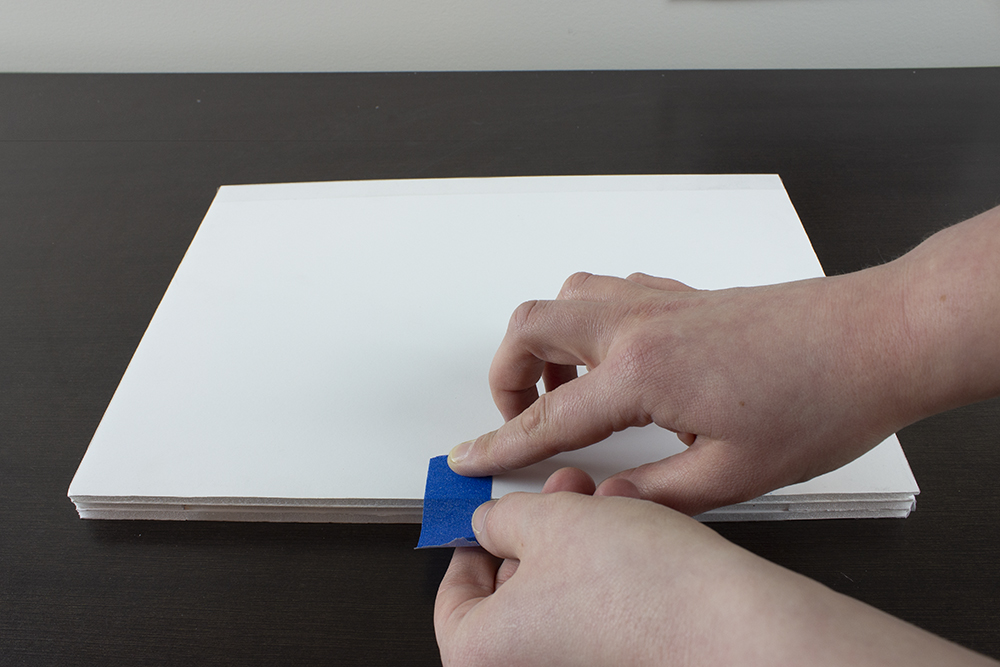
xiv. Tape one of the long edges of the cover using a more than permanent tape, like the packing tape I have been using so far.
Tape the opposite edge using a removable tape, like painter's tape, so that you tin can easily open up the carrying case without distressing your drawing.
15. Admire your completed carrying case!
I hope this article helps y'all store your fabulous drawings safely and conveniently!
Accept other ideas on how to store charcoal drawings? Exit a comment below!
![]()
Enjoyed this folio? Delight share it!
Share buttons and pinnable image below:
Related Pages
If you enjoyed this page on How to Store Charcoal Drawings, you lot may besides enjoy ...
Return to Cartoon Supplies from How to Store Charcoal Drawings

Source: https://www.thedrawingsource.com/how-to-store-charcoal-drawings.html
Posted by: barberfolve1970.blogspot.com
0 Response to "How To Pack A Charcoal Drawing For Shipment"
Post a Comment